In today’s digital age, graphic design is a crucial skill for businesses, marketers, and creatives alike. Whether you’re creating social media posts, blog graphics, or advertisements, having visually appealing content can make all the difference. Enter Snappa, an online graphic design tool that promises to help you create stunning visuals in minutes, even if you’re not a professional designer. So, in this ultimate tutorial, we’ll explore how to use Snappa, its features, and tips to master graphic design quickly and efficiently.
What is Snappa?
Snappa is a user-friendly, web-based graphic design tool that simplifies the design process. Additionally, it offers a wide range of templates, graphics, fonts, and tools to help you create eye-catching designs without needing extensive design skills. So, with Snappa, you can design everything from social media posts and ads to infographics and banners, making it a versatile tool for any creative project.
Getting Started with Snappa
- Sign Up and Log In: To get started with Snappa, you’ll need to create an account. Moreover, the platform offers a free plan with limited features and a paid plan with additional tools and assets. Once you’ve signed up, log in to access the dashboard.
- Choose Your Canvas Size: The first step in any design project is selecting the right canvas size. So, Snappa offers predefined sizes for various platforms, including social media posts, blog graphics, headers, and more. You can also create custom sizes if needed. So, simply select the appropriate size for your project and start designing.
- Explore Templates: Snappa provides a vast library of pre-designed templates that you can customize to suit your needs. These templates are categorized by use case, such as social media, blogging, ads, and more. Also, browse through the options, and choose a template that aligns with your vision. Templates are a great starting point, especially if you’re new to graphic design, as they provide a solid foundation to build upon.
Mastering the Snappa Interface
Snappa’s interface is designed to be intuitive and user-friendly. So, here’s a quick overview of the main elements you’ll find on the platform:
- Canvas: The canvas is where you’ll create and edit your design. Additionally, you can add text, images, shapes, and other elements directly onto the canvas. So, Snappa allows you to move, resize, and rotate elements with ease, giving you complete control over your design.
- Tools and Features: On the left side of the screen, you’ll find various tools and features to help you create your design. So, these include:
- Backgrounds: Choose from a variety of background options, including solid colors, gradients, and images. You can also upload your own images to use as backgrounds.
- Text: Add and customize text with different fonts, colors, sizes, and styles. Additionally, Snappa offers a wide selection of fonts, making it easy to find the perfect one for your design.
- Graphics: Access a library of icons, shapes, and illustrations to enhance your design. Also, these graphics can be resized, recolored, and positioned as needed.
- Photos: Snappa provides access to a vast library of high-quality stock photos. You can also upload your photos to use in your designs.
- Layers: Like many professional design tools, Snappa uses layers to help you organize and manage the elements in your design. Additionally, the layers panel, located on the right side of the screen, allows you to rearrange, duplicate, and delete layers as needed.
- Undo/Redo: Did you make a mistake? No worries! Snappa includes undo and redo buttons at the top of the screen, allowing you to easily correct any errors.
Creating Your First Design
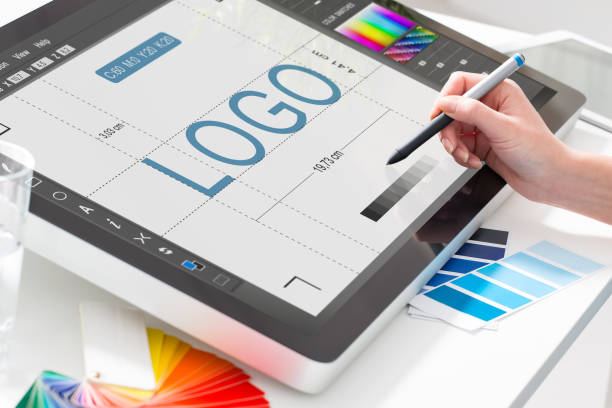
Now that you’re familiar with the Snappa interface, it’s time to create your first design. So, let’s walk through the process step-by-step:
- Select a Template or Start from Scratch: Begin by choosing a template that suits your project, or start with a blank canvas if you prefer a completely custom design.
- Customize the Background: Click on the “Background” tab to choose a background color, gradient, or image. You can also upload your image if desired. Adjust the background settings until you’re satisfied with the look.
- Add and Edit Text: Click the “Text” tab to add headings, subheadings, and body text. Additionally, use the text editor to customize the font, size, color, and alignment. Play around with different font combinations to find the perfect match for your design.
- Incorporate Graphics and Photos: Use the “Graphics” and “Photos” tabs to add icons, illustrations, and images to your design. Also, you can resize, rotate, and position these elements as needed. Remember to keep your design balanced and visually appealing.
- Apply Filters and Effects: Snappa offers various filters and effects to enhance your design. Additionally, experiment with different options to see what works best for your project. Just be careful not to overdo it—sometimes, less is more.
- Save and Download: Once you’re happy with your design, save your project by clicking the “Save” button at the top of the screen. You can then download your design in various formats, including PNG, JPG, and PDF.
Tips for Mastering Snappa
- Experiment with Templates: Don’t be afraid to explore different templates and layouts. Snappa’s templates are highly customizable, so you can tweak them to fit your brand’s style and message.
- Use High-Quality Images: High-quality images can significantly enhance your design. So, take advantage of Snappa’s stock photo library, or upload your own high-resolution images.
- Keep It Simple: While it’s tempting to add lots of elements to your design, simplicity often leads to more effective visuals. Moreover, focus on a clear message and avoid cluttering your design with unnecessary elements.
- Stay Consistent: Consistency is key to creating a cohesive brand identity. So, use consistent colors, fonts, and design elements across all your graphics to build a recognizable brand.
- Leverage Snappa’s Resources: Snappa offers a blog, tutorials, and other resources to help you improve your design skills. Also, take advantage of these resources to learn new techniques and stay up-to-date with design trends.
Conclusion
Snappa is an excellent tool for anyone looking to create professional-quality graphics quickly and easily. Whether you’re a beginner or an experienced designer, Snappa’s user-friendly interface and extensive library of templates and assets make it a valuable addition to your creative toolkit. So, with a little practice and creativity, you’ll be able to master graphic design in minutes and produce stunning visuals that captivate your audience. So, what are you waiting for? Dive into Snappa and start designing today!
